


Key Takeaways
- Confirm basic settings and safety before troubleshooting by checking the thermostat mode, access panels, and any warning lights to avoid unnecessary repairs and ensure safe operation.
- Confirm power and thermostat communication: Check breakers, fuses, batteries, and wiring. Then reboot or test with a multimeter when safe to isolate electrical or control problems.
- Check airflow — filters, vents, blower, outdoor coils. Swap out dirty filters and clear debris to prevent freeze-ups.
- Describe the diagnostic clues such as error codes, strange noises and ice buildup to help you narrow down the probable causes and prioritize focused repair or diagnostics.
- Identify primary failure drivers like low refrigerant, defective parts, control board errors and environmental or installation issues. Steer clear of operating the system if refrigerant or electrical issues are suspected.
- Call a qualified HVAC technician for persistent failures, refrigerant leaks, major electrical issues, burning smells, or when replacement and safe testing of components require professional tools and training.
Heat pump not turning on troubleshooting describes how to identify and repair why a home heat pump won’t turn on. The most common culprits are tripped breakers, thermostat errors, low refrigerant, clogged filters, and faulty contactors.
Basic power, thermostat, and filter checks can usually get it working again in a jiffy. More complicated problems might require a professional technician to safely diagnose and repair.
Here are practical steps below.
Preliminary Checks
Before you get into deeper diagnostics, run a series of basic checks that most homeowners can safely do. They check mode, power, and airflow so you don’t waste service calls.
Assuming these things look right but the heat pump still won’t run, take a closer look at the indoor and outdoor units or call a technician.
Thermostat Settings
Ensure the thermostat is on the correct mode: set to Heat for heating or Cool for cooling, never Off or Fan-only when you expect conditioned air.
Check fan control is Auto not On so the system cycles as intended. On can mask compressor start attempts.
Adjust the set temperature a few degrees above or below room temperature to trigger the heat pump to turn on. If the unit still doesn’t activate, replace the thermostat batteries—blank or flickering displays indicate low power.
For smart thermostats, check schedules, geofencing, or remote lockouts that can disallow operation and review any app alerts. A schedule set to ‘Hold’ or a vacation mode can appear to fail but is simply a setting.
Power Source
| Symptom | Possible Cause | Quick Fix |
|---|---|---|
| No display on thermostat | Dead batteries or lost power | Replace batteries; check breaker |
| Unit dead outside | Tripped breaker or blown fuse | Reset breaker; inspect disconnect switch |
| Intermittent operation | Loose wiring or partial power loss | Try outlet or lamp nearby; call electrician if needed |
Checking the indoor air handler and outdoor unit for blown fuses, tripped breakers or an open service disconnect switch.
Try some adjacent outlets or lights to eliminate a broader power outage. Assuming all is well, reset the heat pump by turning off its dedicated circuit breaker for 30 seconds, then turn it back on.
Give it a few minutes to reboot and try again.
Air Filters
Take out and examine the air filter at the indoor unit for obvious build-up of dust, pet hair or clogging that limits airflow. A dirty filter can result in the system overheating and failing to start.
If disposable filters are dirty, replace them or wash and dry reusable filters immediately, trying to change filters every one to three months based on use and household factors.
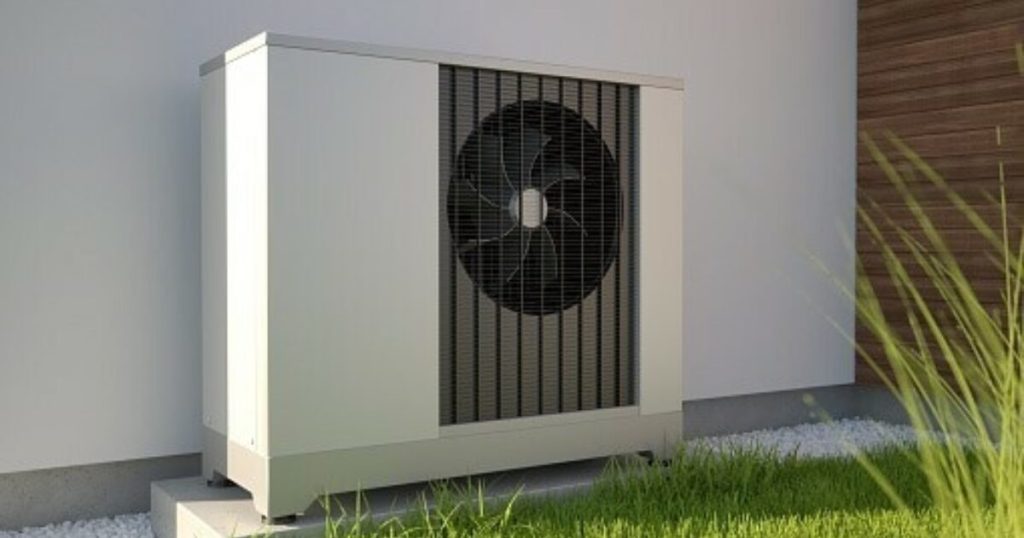
Check for poor airflow or cold air blowing near vents and registers, and keep them open and clear so airflow is not blocked. Clear debris and foliage from around the outdoor unit to keep airflow free.
Seasonal service by a technician will catch problems early.
Why It Fails
Common reasons for a heat pump not turning on are diverse and often overlapping. Below is a concise list of typical failure points:
- Electrical faults include tripped breakers, blown fuses, loose wiring, and failed capacitors or relays.
- Thermostat issues include bad wiring, incompatible models, software glitches, and weak batteries.
- Airflow problems include blocked vents, clogged filters, dirty indoor blowers, and restricted outdoor coils.
- Component malfunction: failed compressor, contactor, start capacitor, reversing valve, and defrost board.
- Refrigerant problems include low charge, leaks, ice on coils, and improper system pressure.
- Environmental factors include debris, snow, ice, and lack of clearance around the outdoor unit.
- Age and maintenance include worn parts, missed service checks, and systems older than 10 years.
Electric faults tend to cause an immediate heat pump shutdown. Check the breaker panel first for tripped breakers or blown fuses and reset only after ensuring you have no short. Loose or corroded wires at the unit, control board, or terminal strip can break power.
Listen for humming, breaker trips, or no power at all. Test incoming voltage at the outdoor unit and at the fan or compressor terminals with a multimeter. Burnt smells, scorch marks, or melted insulation all need immediate shutdown and expert repair as they indicate a fire risk.
Thermostat communication errors are an easy, addressable culprit. Check wiring from the thermostat to the control board and fault codes or blinking LEDs that indicate a communication fault. Reset the thermostat and swap batteries if necessary.
Check for model compatibility; certain smart thermostats require certain heat pump settings or a common wire. If the thermostat won’t control the unit, the control board may not be getting a signal even if everything else looks okay.
Airflow obstruction slows heat transfer and can even prevent normal cycling. Check for and open blocked vents, closed dampers, and furniture restricting room airflow. Change or clean air filters every 1 to 3 months.
A dirty filter makes it work harder and output less. Inspect the blower motor and fan for dust, worn belts, or seized bearings. Outside, leaves, snow, or ice can block the coil and fan. Keep at least 0.3 to 0.6 m (1 to 2 ft) clearance around the outdoor cabinet for free airflow.
Compressor failures and refrigerant problems seem to feel the same. The compressor requires a functioning start capacitor and contactor to operate, and if the compressor is dead, the unit won’t start. Low Freon displays as ice on coils or feeble heat or AC.
Never run the pump long with suspected refrigerant faults, as this risks compressor burnout. Routine maintenance, preferably in the spring and fall, catches wear before catastrophic breakdown.
Diagnostic Clues
Begin with dealing diagnostic clues—objective information from the system—prior to swapping parts. Thermostat readouts, error codes, and behavior observed direct focused actions. Observe air flow, temperature changes, and any new noises.
A brief symptom checklist helps narrow causes: no power, short cycling, weak airflow, unusual noises, ice on coils, water where it shouldn’t be, or persistent error codes. Manufacturer manuals and online technical bulletins are indispensable in translating alerts and connecting them to probable issues.
Error Codes
- Review the thermostat and outdoor unit display for saved codes and timestamp.
- Just grab the heat pump manual or the manufacturer’s online code list and compare codes to part failures.
- Power-cycle the system after noting codes to determine if codes clear or return.
- If a code comes back, follow the manual’s diagnostic tree to test sensors, wiring, or control boards.
- Rank repairs for compressor, reversing valve, or safety limit failures indicated by codes.
- Record every step and code modification in case you have to call in professional help.
Unusual Noises
Hear grinding, screeching, or banging that indicate mechanical wear or loose components. Pay attention to when the sound occurs — startup, steady operation, or shutdown — because timing connects noise to particular components.
Check out the blower, fan motor, and compressor area to localize the source. Loose fan blades or motor bearings frequently create rhythmic rattles. A non-stop high-pitch squeal indicates that a belt or motor bearing is going bad.
Intermittent clanks suggest debris or mounting bolts. Treat loud or new noises as soon as possible to avoid collateral damage. Some problems, such as a compressor bearing failure, cannot be patched and require service immediately to avoid complete loss.
Ice Buildup
Check outdoor coils and refrigerant lines for frost or ice. A light frost in winter is natural, but that thick ice or heavy build-up has to be dealt with pronto.
See if the unit initiates and completes defrost cycles. Inability to defrost is indicative of a control or sensor fault and typically requires professional repair.
In summer, a frozen coil is a red flag; it may suggest low refrigerant, blocked airflow, or a stuck reversal valve. Ensure proper airflow. Check filters and return vents and look for debris or snow blocking the outdoor unit.
Water on the outdoor unit in winter can freeze on the coil and re-form ice. Clear drainage and correct defrost operation are key. Low refrigerant usually results in weak heating or cooling and may cause icing. A leak test and proper recharge are the usual follow-ups.
The Control Board
About the control board The control board is the main circuit board that manages a heat pump’s function. It resides most commonly in the indoor unit and connects the thermostat, compressor, reversing valve, fan motors, defrost controls, safety switches, and auxiliary heat.
When your heat pump won’t turn on, the control board is a great place to start because it receives command signals, times sequences, and reports error codes via diagnostics or LED codes.
What It Does
The board controls the heating, cooling, and emergency heat stages, switching relays and outputs in the proper sequence so parts turn on and off without conflict.
It controls safety switches and sensors, including high-pressure cutouts, low-pressure switches, flow sensors, and temperature limits. It will inhibit operation if a safety threshold is tripped to avoid damage.
It controls defrost and aux heat timing, determining when to switch the reversing valve, defrost, or engage the backup heater by sensor inputs and time intervals.
It communicates with the thermostat and other system components over hardwired terminals or data buses, translating user requests into coordinated actions and logging faults that technicians use for diagnosis.
Why It Fails
Control boards go bad due to power surges, lightning strikes, moisture intrusion, mice, vibration, or manufacturing defects. These problems harm traces, components, or solder joints.
Symptoms include an unresponsive system, a heat pump that won’t turn on, random shutdowns, operation without heating or cooling, and persistent error codes or blinking LED patterns.
Bad relays, corroded terminals, or weak solder joints cause intermittent contact, leading to funny operation like fans that shut off mid-cycle or compressors that won’t start even when the thermostat demands heat.
Repeated electrical faults, frequent short cycling and poor maintenance reduce board lifespan. Dust and debris may trap moisture or develop conductive paths that hasten failure.
How To Check
Turn off the heat pump at the breaker prior to opening the access panel. Examine the control board for burnt areas, bulging capacitors, cracked components, or dampness.
Make sure wiring is secure, and terminals are tight. Loose or corroded connections often masquerade as board failure and are easy to repair.
Photo wiring before taking it apart so the put back together is right. With a multimeter, confirm that the board is receiving the proper supply voltage and test relay outputs while always practicing safety.
If diagnostics indicate the board and physical inspections verify damage, replacement is typically necessary.
It’s true that resetting or reprogramming can fix certain problems, but quite a few require a seasoned technician and their specialized equipment. Routine cleaning and inspection during service calls avoids issues and prolongs board life.
Environmental Impact
Heat pumps impact the environment in multiple ways. External factors like weather extremes, debris, and installation decisions can drive systems to work harder, consume more energy, and heighten the risk of refrigerant leaks. Knowing how site conditions and regular maintenance shape system performance keeps it from shutting down and minimizes environmental damage.
Extreme Weather
Cold snaps and heat waves expose system stress immediately. At very cold temperatures, a heat pump may escalate to emergency heat or turn on auxiliary heat strips, which consume more energy and generate more CO2 than typical heat pump operation. Track performance as the thermometer drops or spikes. Quick cycling, lost capacity, or extended run times indicate stress.
Shield the outside unit from snow, sleet, and flooding. A buried or ice-clogged coil can shut down heat exchange and cause a shutdown. Elevate units above anticipated flood levels and maintain drainage. Arrange for maintenance around seasonal changes so service techs can check defrost controls and ensure the unit leaves defrost correctly, minimizing the chance of recurring faults.
Extreme weather connects to emissions. When a heat pump operates efficiently, it can reduce household heating-related CO2 to approximately 4,950 pounds per year compared to around 9,900 pounds for electric resistance heating and over 38 percent less than average gas furnaces. If the unit depends on backup electric heat during cold spells, those advantages decrease.
Debris Blockage
Leaves, grass cuttings and settled dirt impede airflow across the outdoor coil and decrease efficiency. Keep the area surrounding the unit clear on a regular basis to prevent blocked intake and exhaust paths. Impeded airflow increases compressor strain and can lead to overheating or short cycling.
Check vents and ensure no blockages. Small blockages cause big failures, including frozen coils. Clean snow or ice buildup as soon as it arrives. A frozen coil inhibits heat transfer and can trigger safety shutoffs.
Consider protective screens or a louvered fence to limit debris while preserving airflow. Screens slow the accumulation of leaves and litter and make routine cleaning easier. This reduces maintenance frequency and the chance of emergency repairs that could involve refrigerant handling.
Installation Flaws
Improper placement or a unit that sits off-level alters refrigerant flow and strains components. Check that the outdoor compressor is level and on a firm pad away from heavy runoff. Verify refrigerant and electrical connections comply with manufacturer specs. Both undercharged and overcharged refrigerant conditions decrease efficiency and potentially increase leak risk.
Check ductwork for leaky gaps, insufficient insulation or return/supply imbalances. Leaky ducts drive longer runtimes and cause indirect emissions by increasing energy consumption. Correct installation mistakes sooner rather than later to spare repair redundancies and the greater ecological footprint of early component replacement.
Professional Help
There’s the benefit of professional assistance. A trained technician has the training, the tools and access to diagnostic systems needed when a heat pump won’t start or displays critical faults. These are typical circumstances where it’s time to call in a professional.
- Unit won’t power up after a quick check of the thermostat, breaker, and disconnect.
- Persistent error codes or alarms on the control board.
- Suspected refrigerant leak or visible oil stains at fittings.
- Repeated circuit breaker trips or complete electrical failure.
- Burning smells, smoke, overheating, or melted wiring.
- Motor, compressor, or capacitor failure indications.
- System older than 10 years with frequent breakdowns.
- Installation or major component replacement (compressor, reversing valve).
When To Call
Call for professional help if the heat pump still won’t start after you check the thermostat settings and breakers and the outdoor unit for obvious blockage. A tech will typically start by verifying the thermostat and control voltages and then proceed to the outside unit.
Schedule service for stubborn error codes, refrigerant leaks, frozen lines, or any oil spotting near connections. Refrigerant handling is certified in most places and improper handling creates environmental and legal hazards and does not address the underlying issue.
Have it diagnosed if your breaker trips repeatedly, ground-fault devices trip, or you have a complete power loss. Those symptoms typically indicate wiring issues, shorted motors, or failing contactors, which can cause fire hazards if neglected.
Reach out to an HVAC tech the minute you smell burning, see smoke, or discover hot junction boxes. These could point to arcing, failed capacitors, or insulation breakdown and need quick attention to prevent damage or injury.
What To Expect
Expect a methodical inspection: thermostat verification, control voltage checks, contactor and relay testing, capacitor and motor current measurement, compressor health checks, and refrigerant pressure readings. Technicians utilize gauges, multimeters, and even dealer remote access (DRA) to read system logs and settings.
They’ll provide you with a diagnosis and give you a quote for parts and labor. Estimates generally break out repair versus replacement costs and provide labor hours as well as an option for warranty. If the compressor or capacitor is on its way out, anticipate straightforward choices and price ranges.
Pro Tip: A pro will tell you it’s best to get your filters swapped out, your coils cleaned and schedule tune-ups to catch minor issues early and extend service life. Preventative maintenance lessens service calls and keeps output at maximum.
Compare upgrade options when the system is old or repairs are frequent. If it’s more than 10 years and repair costs are increasing, replacement with a higher-efficiency heat pump may be more cost-effective. Technicians can size and price replacements and discuss rebate or financing options.
Conclusion
Troubleshoot step by step. Start with the simple checks you already read: power, breaker, thermostat batteries, and filter. Keep a record of any error codes and the precise noises the system produces. If the outdoor unit remains silent or the fan won’t turn, check the contactor and capacitors next. If the control board has no life, test the transformer and fuses. Test using a meter for clear reads. Keep in mind that low refrigerant or frozen coils alter the system start and can assist you in deducting the cause. Call a licensed tech for sealed-system work, capacitor swaps, or control-board replacement.
Just maintain a brief record of what you attempt, the readings you obtain, and what time of day it is. Pass that along to the technician. Set up a service call if the unit still won’t run.
Frequently Asked Questions
Why won’t my heat pump turn on at all?
Check power first. Check your circuit breaker and the outdoor unit switch. Make sure your thermostat has new batteries and is set correctly. If power is there but still won’t come on, a control board or safety switch may have gone bad.
How can I tell if the thermostat is the problem?
Set the thermostat to a temperature significantly above room temperature for heat or below for cool. If the indoor blower doesn’t respond, replace it with a working thermostat or use the system’s controls to isolate.
Could a frozen outdoor unit stop it from starting?
Yes. Ice buildup can trip safety controls and keep the system from starting up. Switch off the system and let the unit defrost. Check the refrigerant and the defrost cycle if freezing returns.
What does a humming noise mean when the heat pump won’t start?
Humming could be a stuck compressor or defective relay. It can indicate the motor is getting power but cannot start. Don’t muscle it—call a technician so you don’t cause any additional damage.
Can low refrigerant cause no startup?
Low refrigerant usually just diminishes heating or cooling output and can trip pressure safety switches that prevent the unit from starting. Have a certified technician check levels and repair leaks.
When should I call a professional?
Call a professional if safety switches, compressor, control board, or refrigerant are involved. Call when electrical wiring, recurring faults, or unknown diagnostic codes show up. Professionals provide safe, proper repairs.
Will running the unit short-cycle damage it?
Yes. Short-cycling adds wear and can harm the compressor and controls. Pinpoint underlying causes such as thermostat location, low refrigerant, or control defects and address them without delay.