


Key Takeaways
- Evaluate your electrical panel and wiring prior to selecting a mini split. Schedule electrical upgrades to accommodate amperage requirements and local codes for safe, dependable performance.
- Examine wall materials and anchoring locations. Implement reversible or reinforced mounting to preserve historic plaster, brick, or lath while securing units.
- Size and position indoor units to accommodate room layouts and living zones. Prioritize airflow, furniture positioning, and individual thermostats to minimize energy consumption.
- Work on your insulation, draft-proofing and attic ventilation wherever it’s needed to complement this system with an efficiency boost and more consistent upstairs temperatures.
- Select unit styles and hide lines to maintain the home’s historic character, adhere to local preservation guidelines, and record any temporary alterations.
Maintenance schedule — plan for filter care, leak inspections, and condenser clearance. Compare mini splits with alternative HVAC options to make long-term value decisions.
How these systems add efficient room-by-room heating and cooling without new ductwork. They mount in rooms and connect to an outdoor compressor via tiny refrigerant lines. Older homes require load checks, wall reinforcements, and vintage wiring. Prices differ by size and insulation. The meat details sizing, installation steps, and maintenance for enduring comfort and value.
Core Considerations
Older Dixon homes often predate modern HVAC needs. Many were built before the 1950s and lack ductwork or insulation designed for cooling. Assess the house as a system: structure, wiring, and finishes affect what mini splits can do and how much work installation will require. Below are focused factors to weigh when deciding on ductless mini splits for an older property.
1. Electrical Capacity
Have your electrical panel checked early. Older homes might have fuse boxes or tiny breakers that won’t support the additional load. Every indoor or outdoor mini split has particular amperage requirements. Consider the service size in amps and the total of loads and units proposed. Things like upgrading the panel or running new circuits are common, so factor the cost and timeline. Do all work to local electrical codes and obtain permits. Safety and code compliance thwarts failures and liability. Think about staggered start controls or soft-start options to minimize peak draw if full panel replacement is unfeasible.
2. Wall Integrity
Plaster, lath, solid brick and thin stud walls all respond differently when mounting indoor units. Test wall strength at locations where handlers will hang. Use backing or blocking behind plaster to distribute loads and prevent cracking. No big chases in original plaster; mini splits need a small 3-inch hole for refrigerant lines compared to the wide 10-inch ducts central systems demand, saving more fabric. Secure weak areas with plywood or metal plates if necessary. Team with a contractor experienced in historic materials to help protect finishes and minimize visible repairs.
3. Room Layout
Room dimensions and function. Mini split sizing is based on room volume, orientation, and heat gain. Upstairs bedrooms frequently run hot in the summer and basements stay cool, which is a typical pattern in older homes. Position air handlers for cross-flow and steer clear of obstructed discharge paths behind furniture. Core Considerations Use a basic table that correlates room sizes with suggested BTU ranges to weigh your options and determine when single-zone or multi-zone systems are optimal. Strategic location minimizes short cycling and enhances comfort without oversizing.
4. Insulation Levels
Look at attic, wall, and crawlspace insulation. Most older homes aren’t insulated well enough, which adds load and minimizes mini split efficiency. Install new insulation and caulk drafts around windows and doors. Major upgrades like attic insulation, sealing rim joists, and weatherstripping reduce energy demand and allow a smaller mini split to get the work done. A better building envelope and a super-efficient SEER2-rated mini split lead to more comfort and lower bills all year long.
5. Aesthetic Impact
Opt for wall units and neutral colors that harmonize with interiors. Hide tiny refrigerant lines in paintable conduits or baseboard runs. Locate outdoor condensers where they are least visible from the street, either with decorative screens or custom enclosures that still permit airflow. Make installations reversible. Wherever possible, protect historic character. Maintenance keeps the looks and the system’s 15 to 20 year life.
Historic Preservation
Historic preservation is about maintaining the original character of the building and adapting it for contemporary use. Historic preservation: Old Dixon homes were constructed with materials and craftsmanship that matter. That matters when you’re adding a ductless mini-split because the idea is to add comfort without sacrificing cornice, trim, plaster, or window sash that give the house its worth. Retrofitting modern systems is doable, but it requires delicate planning involving thorough analysis of the original architecture, framing, and finishes prior to any work.
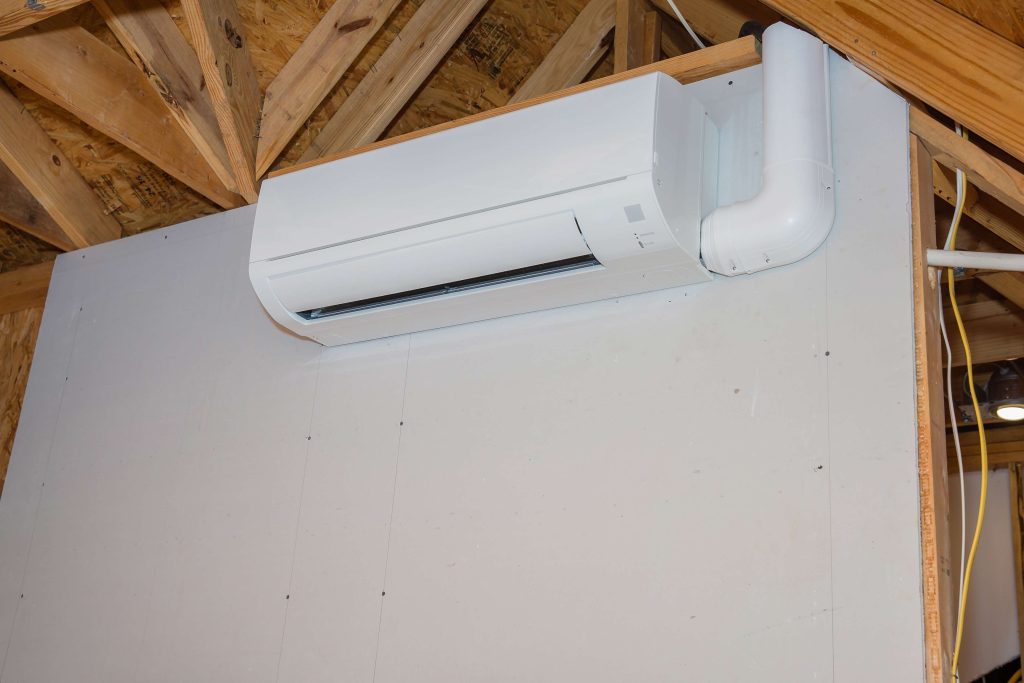
Be mindful of historic details when designing installation. Plan out where wall studs, plaster keys, and moulding and trim are. Don’t string lines over crown moulding or through original window casings. Locate indoor units beneath simple wall areas, in closets, or along a less conspicuous wall to maintain uninterrupted sightlines. Spray low-profile heads and paint-matched conduits where you can so the unit reads as a discreet element. Old buildings tend to have single-pane windows and light insulation, so expect higher heating and cooling loads. Estimate greater BTUs per square metre for drafts and heat loss.
Pick reversible mounting options. Surface mounts, freestanding floor units, or bracket systems that bolt to mortar joints instead of anchoring to original timber keep work reversible. Non-masonry screws in cavities do not cut through decorative plaster. For exterior condensers, sit them on ground pads or on freestanding brackets rather than bolt into historic cladding. Where wall penetration is required, minimize hole sizes and route lines through existing chases or behind baseboards if feasible so future owners can uninstall and restore the surface.
Trace any changes in case you need to restore later. Photograph, document, and measure-draw before and after every cut, chase, and fix. Tag which screws, plugs, and patches you used and save a map of where lines run behind walls. This documentation aids future conservators in deciphering treatments and facilitates quality restoration should the piece be dismantled in the future.
On the historic preservation side, consult municipal conservation rules, local landmark commissions, or heritage overlays before installing devices. Certain jurisdictions do demand review of visible above-ground modifications as well as explicit policies on penetrations, paint, and mounting hardware. Use installers familiar with drilling through older materials. Nineteenth- and early twentieth-century horse-hair plaster needs special drills and vacuum capture to avoid cracking. Framing members may be irregular, so probe first to find safe routes. Central ductwork is almost always more invasive, expensive, and time-consuming than mini-splits, so trade it off against reversible mini-split possibilities.
Strategic Placement
Strategic placement directs you where to place indoor air handlers and the outdoor compressor to achieve even temperatures, good airflow and easy maintenance. Maintain a 2-foot (approximately 0.6 m) clearance all the way around each indoor unit so air can circulate freely. Wall penetrations are tiny, just a few inches, and every head requires just one 3-inch (~7.5 cm) hole for the line set, so you can install units without making big cuts or chases.
Living Zones
Section the home into distinct living areas by function and inhabitant. Place heads where people spend most time: living room, kitchen-adjacent dining, primary bedroom, and a den or home office. Place one thermostat or control per indoor unit so each zone runs only when needed. This reduces waste and provides accurate temperature control. By only conditioning used rooms, it reduces energy by not doing whole-house runs when parts of the house are empty. For older Dixon homes with various sized rooms, place smaller heads in smaller rooms and higher-capacity heads in open-plan areas to balance load.
Don’t ‘hide’ indoor units next to a source of heat or sun, i.e., walls adjacent to ovens or south windows with sun beating on them. Keep the 2′ clearance and don’t obstruct the grill with furniture or curtains. Wall thickness or siding type do not prohibit placement as the line set is small and flexible. Use the shortest practical run from the interior head to the outdoor condenser to restrict refrigerant length and potential efficiency loss.
Upper Levels
Upstairs rooms tend to be warmer than downstairs. Strategic placement: Install dedicated air handlers on upper floors instead of one lower unit pushing air up. This eliminates uneven temperatures and long run times. Think about having an upstairs unit on an internal wall or above the stairwell to assist air mixing. If you can, optimize attic ventilation to restrict heat soak. Vents or a small fan can reduce the mini split’s peak load.
Second floor units may require higher capacity or more frequent use, so contrast cooling requirements of main and second floors to size heads appropriately. Select systems with strong low-ambient heating and low sound ratings so both floors stay cozy and quiet. Strategic placement of the outdoor condenser is important. Place it away from pathways and garden beds so that it has unobstructed airflow and space for service access, preferably 0.5 to 1.0 meters (50 to 100 centimeters) clearance on all sides if possible. Good placement and installation assist the system in fulfilling its anticipated 15 to 20 year lifespan.
Do’s: Keep 2-foot clearance, avoid direct heat, use short line runs, and give outdoor unit service space. Don’ts: Do not block grills, install near noisy zones, route line set through living areas without insulation, or crowd condenser against landscaping.
Regional Climate Adaptations
Ductless mini splits have to hit Dixon’s seasonal swings just right to work well in an older home. Opt for models designed for broad temperature ranges so that the system can accommodate both summer peaks and winter lows. For summer, make sure the unit’s cooling capacity has margin for hot spells. For winter, select units with demonstrated low-ambient efficacy. In cold regions, a conventional heat pump cannot necessarily be the sole heat source. Plan to match the mini split with a backup heat source if the unit cannot maintain indoor comfort once temperatures fall very low.
Select mini split models rated for Dixon’s seasonal temperature swings
Select systems with published performance curves demonstrating their cooling and heating at the anticipated local extremes. Seek out cold-climate models that specify a high BTU output down to low temperatures. A dependable cold-climate unit will maintain at least 70% of rated BTU at 5°F (-15°C). Look at manufacturer tests for capacity at 0°C and below. For hot summers, look at both SEER and cooling capacity at high outdoor temperatures. Examples include a single-zone unit rated for -15°C heating and a multi-zone outdoor unit rated to keep full cooling at 43°C, which will cover most swings.
Adjust system sizing for extreme summer heat or winter cold
Size on the home’s shell and real heat loss or gain, not thumb-of-rule room area. Older Dixon homes tend to be leakier and less insulated. Conduct a manual J or use a qualified contractor to size each zone. That regionally is about climate adaptations. In extreme heat or cold, oversize a bit for peak days or throw an additional indoor head on a problem room. For bigger houses, deploy a multi-zone outside compressor with two to four indoor units to balance loads. Verify the home’s electric panel can support the new load. Lots of installs require a dedicated 15 to 30 A circuit at 208 to 240V.
Incorporate dehumidification features for humid conditions
Moderate temperatures with high humidity are less comfortable. Select units that have integrated dehumidify or ‘dry’ modes and adjustable fan speeds. For very humid summers, consider a unit with enhanced moisture removal or an add-on whole-home dehumidifier. Position heads inside where air removes stagnant, damp pockets. Basements or poorly ventilated rooms typically require special care.
List climate-specific settings to optimize year-round performance
Utilize low-ambient heating mode, defrost and anti-short-cycling timers during cold months. Set fan curves so it doesn’t overcool during the humid months and use two-stage compressor settings when available. Where possible, mount outdoor units on elevated brackets or pads away from roof drip edges and typical snow drift paths to avoid burying and icing. Proper location and settings keep the system efficient throughout Dixon’s seasons.
Alternative Perspectives
Ductless mini splits aren’t the only path for the older Dixon homes. Homeowners need to balance options, costs and performance with the house’s configuration and future plans. We contrast it with alternatives, provide explicit advantages and disadvantages, observe resale implications and report typical homeowner responses so you can see what suits you best.
Explore other HVAC options like high-velocity systems or window units
High-velocity systems utilize small, flexible ducts to deliver high-speed air, allowing them to snake through narrow wall cavities and requiring less invasive work than full duct installs. They maintain the original plaster and trim in period homes and offer whole-house conditioning. However, they’re pricier than no-frills window units and can feel drafty if not properly balanced. Window units are inexpensive, quick to install, and good for single rooms or temporary use. They are noisy, inefficient, and bad at humidity control. Packaged terminal heat pumps and through-wall units fall between window units and full HVAC in price and performance. They save space and are less visible, but typically serve only one room per unit.
Weigh pros and cons of ductless mini splits versus traditional solutions
Ductless mini splits sidestep ductwork altogether—a huge boon in older properties with no room for ducts. These can power several indoor units and five comfort zones, allowing residents to only heat or cool rooms in use. Others say it is barely audible inside, some as low as 20 dB, making living spaces quieter than the central system. Heat pumps in mild winter climates can achieve efficiencies around 400%, providing significant energy savings and frequently slashing hundreds of dollars from annual bills. Downsides are higher initial expenses, sometimes as much as 30% more per ton than a traditional system, and an exposed indoor head in every zone. Conventional central systems conceal equipment but require ducts that can be expensive to install and lose efficiency through leaks.
Consider resale value impacts of different HVAC upgrades
Buyers appreciate systems that complement the house’s character and offer dependable comfort. A clean, whole-house HVAC system will increase attractiveness, while a patchwork of window units will damage resale. Ductless systems can add value for buyers seeking energy efficiency and reduced operating costs, particularly in markets that reward upgrades and contemporary features. High-velocity systems installed correctly can save historic finishes and appeal to purchasers who care about authenticity. Include upgrades, energy savings projections, and service history to demonstrate value to future buyers.
Summarize feedback from homeowners with similar older homes
Older homeowners love ductless for less noise, zone control and humidity assistance in humid climates. All of them mention fast comfort post-install and reduced monthly bills. Typical gripes are the increased up-front cost and style of indoor units. These folks picked fast-moving systems such as canned air, but they note that they cause drafts sometimes. Window-unit fans have low cost but provide crummy comfort and lead to higher long-term energy consumption.
Long-Term Maintenance
Long-term maintenance keeps a ductless mini split running well and helping it last. Well-installed and cared for, these systems can last 15 to 20 years or more, some even beyond that. Lifespan is affected by factors like how well the unit was installed, frequency of operation, local environment, equipment quality tier, and consistency of maintenance. Mini splits that run all year long or for long hours wear out quicker. Routine inspections catch minor malfunctions. Increasing energy costs, diminished airflow, or weird noises typically signal problems that, when addressed early, prevent major fixes.
Schedule routine filter cleaning and replacement for peak efficiency
Air filters require manual intervention. Wash reusable filters for two to four weeks, more frequently if the home contains pets, dust, or pollen. Disposable filters need to be replaced according to the manufacturer’s schedule, typically every one to three months. Clean filters maintain steady airflow, minimize strain on the blower, and decrease energy consumption. A fouled coil or blocked filter can increase bills and reduce life. Maintain: Have an extra set of filters available and note filter inspections on a calendar associated with local weather or occupancy cycles.
Inspect refrigerant lines and connections annually for leaks
Get a trained tech to look at refrigerant lines and connections at least annually. Even a slow leak can reduce cooling and heating capacity, increase energy consumption, and damage the compressor if not addressed. Techs will inspect pressure, seek out oil stains at the joints, and test electrical connections. If a leak is detected, repair it promptly and verify the charge. Call in a good contractor that records pressures and temperatures so you can identify slow degradation over decades.
Keep outdoor condenser units clear of debris and vegetation
Maintain a minimum of 0.6 to 1.0 metre of clearance around the outdoor unit. Send them and Rms, grass clippings and dust. Clean the cabinet exterior seasonally and wash fins gently to maintain heat transfer efficacy. If your condenser unit is located near trees or other heavy dust sources, check it on a monthly basis. Snow and ice in cold climates need safe shedding strategies. Do not use sharp tools on fins and avoid piling snow around the unit.
Create a maintenance checklist to ensure system longevity
Build a simple checklist with monthly, quarterly, and annual tasks: filter cleaning dates, outdoor clearances, refrigerant pressure checks, coil cleaning, and an annual full service by a licensed tech. Keep record of run hours, jot down any changes in performance and power consumption so indicators of deterioration are on the radar. Maintenance performed properly will prevent premature failure and may allow for a service life that lasts well beyond 20 years.
Conclusion
Ductless mini splits give you a clean path to heat and cool your older Dixon home with less wall damage and more control. They work great in rooms that lack duct space. Choose units sized to each room. Position heads where the air hits people and misses historic trim. Keep the look with low-profile or paint-matched covers. In colder or hotter zones, pick models rated for those temperatures and supplement with a small electric backup if necessary. Keep a simple service plan: clean filters, check refrigerant, and test controls each year. Discuss with a contractor who understands older houses and local codes. For a precise plan and quotes, have two site visits and compare apples to apples.
Frequently Asked Questions
Can a ductless mini split be installed in an older Dixon home without damaging historic features?
Yes. Installers can utilize small conduits and inconspicuous exterior units. Collaborate with preservation guidelines and a good installer to do as little as possible and leave as much original material as possible.
Will a mini split provide enough heat in a poorly insulated older home?
Efficiency takes a nosedive with bad insulation. Address insulation and air sealing first. A right-sized unit can still provide usable comfort while retrofits cut energy usage.
How do I choose the right capacity for rooms with high ceilings or thin walls?
Have a pro do a load calculation including ceiling height, wall construction, and window surface area. Proper sizing avoids short cycling and keeps you comfortable.
Can the outdoor unit be placed where it won’t affect the home’s historic look?
Yes. Mount options are usually side yards, rooftops, or low visibility areas. Select a location that satisfies clearance and air flow requirements and local preservation laws.
What maintenance is required for long-term reliability in an older house?
Routine filter cleaning, annual professional inspections, and outdoor coil clearance are important. Don’t wait to fix refrigerant leaks and electrical problems because they put performance and indoor air quality at risk.
Are there special permits or regulations for installing mini splits on historic properties?
Frequently, yes. Consult local preservation commissions and building departments. File plans early, so you don’t violate the code and you’re okay with the way it looks on the outside.
How do regional climate factors affect mini split performance and selection?
Select models rated for local temperature extremes and humidity. Cold-climate units and dehumidifying features keep you comfortable and efficient all year round.