


Key Takeaways
- Check your tub for steady dripping, water stains, mineral deposits, or increased water bills to verify a continual leak and gauge the immediacy.
- Determine your faucet variety and locate the leak at the spout, handle, or behind the wall to select the proper replacement pieces and focused repair procedures.
- Turn off the water, assemble basic tools and appropriate washer, O-ring, cartridge or stem replacements, and walk through a step by step take-apart, replace, and reassemble process with plumber’s grease and appropriate seals.
- Test water pressure before and after repair and monitor the faucet and water bill to make sure the fix held and to identify broader plumbing issues that cause recurrent leaks.
- Factor in repair costs, part availability, faucet age, and how often it has leaked in the past to determine if you should fix or replace. Think about investing in good-quality, water-saving, corrosion-resistant materials for long-term savings.
- Take on common issues, teach the family to shut the tap off, and select water-smart components to minimize waste and maximize the lifespan of your bathtub faucet.
How to fix a dripping bathtub faucet details procedures to repair leaks and conserve water. The standard fix is to shut the supply, remove the handle, check the cartridge or washer, and replace worn components.
Typical culprits include mineral deposits, deteriorated seals, or loose gaskets. Simple tools such as a wrench, screwdriver, and replacement parts will generally do the trick.
The meat of it breaks down into step-by-step instructions, safety tips, and when to call a plumber.
Drip Diagnosis
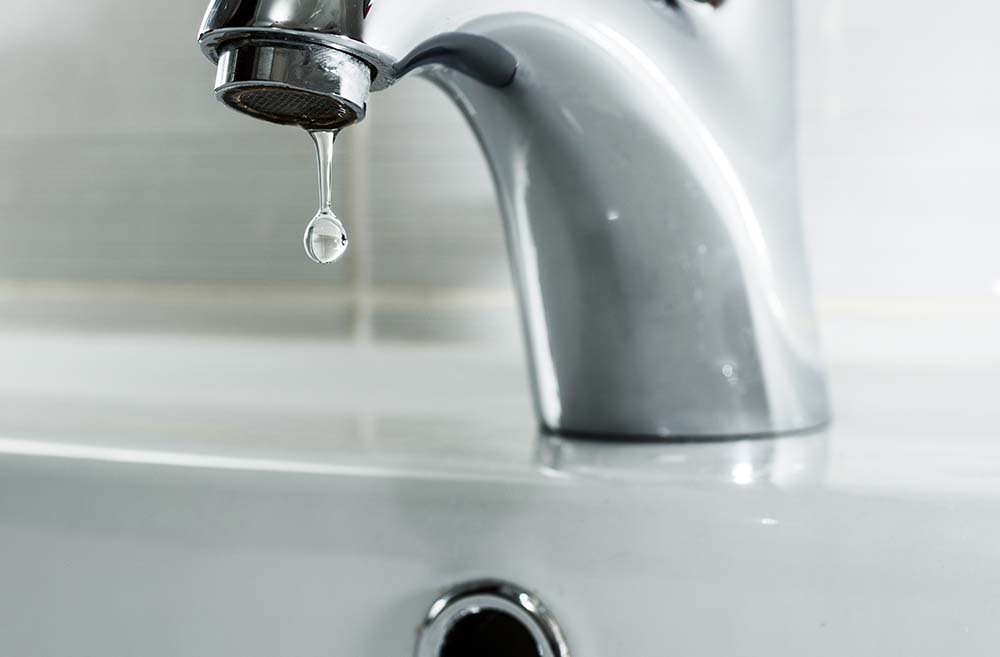
Drip diagnosis – start by observing what a drip looks like and why it’s important. Whether it’s a steady bead at the tub spout, visible stains on the tub or tiles, black mold near seams, or an unusually high water bill, they all indicate a leak. A slow drip can waste more than 3,000 liters of water annually and add approximately $240 or more to bills, especially when hot water is part of the mix.
Ignoring small leaks risks worse outcomes: rotten subfloors, stained ceilings below, and larger repair bills.
Faucet Type
Single-handle, double-handle, and diverter designs need separate parts and procedures. Determine style by the number of handles and whether your tub has a spout with a built-in shower diverter or a separate valve. Handle shape, escutcheon design, and whether the spout unscrews or pulls off are all helpful hints when parts shopping.
- Common types and features:
- Single-handle cartridge: one lever, smooth mixing, cartridge inside body.
- Double-handle compression: two knobs, uses washers, common in older fixtures.
- Ball-type (single-handle): round body, ball valve inside, often has springs and seats.
- Ceramic-disc: flat cartridges, smooth long life, often durable against leaks.
- Diverter spout: built-in diverter pulls up to send water to shower head.
Match replacements by style and manufacturer, if possible. Cartridges in tub/shower valves are known to last 7 to 15 years, sometimes longer with softer water. Washers in compression faucets usually last 5 to 10 years under normal usage. Approximately 70 to 80 percent of repairs are just changing a washer, O-ring, or cartridge.
Leak Source
Drip Diagnosis – Pinpoint whether the leak comes from the spout, handle or behind the wall to focus the repair. Start with a visual check: look for drips on the spout, wetness at the handle base, or damp drywall and staining behind access panels. Take a dry cloth and wipe around suspected areas and see if there is new moisture.
This easy check will often clear up the source within minutes. Check the valve stem and handle internals for worn O-rings or compressed washers. Mineral deposits and debris can clog seats and seals, preventing a good fit and causing leaks. Scrape off obvious calcification, or soak parts in a mild acid solution if safe.
Drip diagnosis: Test your water pressure. Too much pressure puts stress on seals and can cause leaks repeatedly. If the drip is only at the spout and there’s no wall damage, approximately 80% of the folks who attempt a simple washer or cartridge replacement are successful.
If the leak appears to be coming from behind the wall, discontinue use of the fixture and open an access panel or call a pro. Unseen leaks can quickly ruin structural components.
Repair Preparation
Fixing a dripping bathtub faucet demands orderly preparation if you’re going to be efficient and not commit errors. Best practices: Collect tools and parts, shield your workspace, shut the water off, and go over repair steps so you know what’s coming before you dive in.
Essential Tools
Grab an adjustable wrench, flathead and Phillips screwdrivers, a socket wrench set and needle-nose pliers. These cover most faucet fasteners and fittings. Include plumber’s tape (PTFE tape), a faucet repair kit specific to your faucet brand or style, and spare washers, O-rings, cartridges, or replacement stems.
Degraded washers and cartridges are frequent culprits of leaks and having these parts on hand prevents downtime. Keep plumber’s grease and a thread sealant close at hand to grease seals and protect threads during reassembly. It will help stave off future leaks.
Use a small container or magnetic tray for screws, caps and small parts as you disassemble the faucet so pieces are not lost in the drain or under the tub.
Safety First
Shut off the water at the bathroom shutoff or main valve to cease flow through the tub, which keeps you from flooding the house and opens up the cavity for easier inspection. Wear gloves to protect against shrapnel, rust, and cleanser, and goggles when dealing with corroded components.
Make sure the work surface is dry. Wipe up any puddles and set down a non-slip mat as wet floors can cause slips and injury. Set up powerful task lighting to illuminate the faucet body and help you distinguish valve seats from cartridges and retaining clips. Bright light minimizes errors and expedites repairs.
Site Protection and Final Review
Spread towels, old rags, or a plastic drop cloth over the tub and floor around it. This guards finishes against tools, dropped parts, and minor leaks. Set a bucket under the spout to capture any drips when you pull cartridges or stems.
Refresh yourself on the repair process for your particular type of faucet, such as compression, ball, cartridge, or ceramic disc, so you know which pieces to remove and how to put them back together. It helps you identify worn valve seats or corroded areas that may need replacing.
Check water pressure and, if available, measure or otherwise recall normal pressure appropriate to your system. Proper pressure prevents the kind of stress that can exacerbate leaks. A bit of regular cleaning and maintenance, such as descaling mineral deposits, will prevent valves and seats from corroding and prolong your faucet’s service life.
The Repair Process
Repairing a dripping bathtub faucet requires a clear order of work: stop the water, take the faucet apart, inspect parts, replace what’s worn, and put everything back together. A repair usually requires 30 to 60 minutes for an individual with basic tools and some experience.
Keep a flathead and Phillips screwdriver, an Allen key, adjustable wrench, needle nose pliers, and replacement washers or O-rings handy before you begin.
1. Water Shutdown
Identify the tub’s local shutoff valves or resort to the home’s main shutoff if local valves don’t exist. Turn the valve clockwise until it won’t turn anymore to shut off incoming water. Open the handles to faucets to empty as much water from the system as possible and relieve pressure.
Leave both hot and cold open for a minute to be sure. Verify flow has stopped by quickly checking other fixtures or the tub spout for a drip.
2. Handle Removal
Pop off decorative caps with a flathead screwdriver to reveal screws. Unscrew the handle and pull it off. If it’s stuck, carefully rock it back and forth to break mineral build-up or corrosion.
Put screws and handles in a small container so parts are not lost. A few handles have an internal hex screw. Ensure you know whether an Allen key is required before you start forcing it off.
3. Escutcheon Off
Simply unscrew and slide off the escutcheon plate to expose the valve stem and inner components. Remove any caulk or sealant and be careful not to damage tile or wall finishes.
Just remove the plate and look behind it for water damage, mold, or corrosion that indicates a bigger problem. Wipe off the exposed surface so that the escutcheon will seat well when reinstalled.
4. Stem Access
Use an adjustable wrench or socket to unscrew and remove the valve stem from the faucet body. Check that the stem is not worn, pitted, or covered in mineral deposits which commonly cause leaks.
Observe the sequence and position of dislodged parts. Snapping a photo at every step assists in putting everything back together. Save the stem and attached washers or O-rings for measuring.
5. Component Replacement
Install new washers, O-rings, or cartridges with the same or compatible replacements. Incorrect parts will lead to additional leaks. Use plumber’s grease on O-rings and moving parts.
Check that parts fit your faucet model before purchasing. Opt for a cartridge replacement if the wear is severe. DIY part prices are usually between $15 and $100. Professional service costs range from $150 to $350.
6. Reassembly
Put the valve stem back in and tighten. Don’t overtighten because you can strip the threads. Refit the escutcheon, tighten the handle, and replace decorative caps.
Turn the water on and test for leaks, run hot and cold, and check for any weep at joints. If leaks continue or the faucet is older than 10 to 15 years, replacement might be more economical.
Repair or Replace?
Examine the faucet and surrounding plumbing for obvious damage, corrosion, mineral deposits, and loose fittings prior to making a decision. A dripping tap due to worn washers or a cartridge is usually repaired with parts replacement and cleaning. Corroded valve seats, deep pitting, or leaks that won’t go away with simple repairs indicate replacement.
Consider performance history. Frequent past repairs and an older fixture reduce the case for continued patching.
Cost Analysis
Weigh the price of parts, tools, and your time against the cost of a new faucet and installation charges. Replacement washers and cartridges range from a few to tens of dollars. A valve seat or specialty part can be more and harder to source.
New single-handle or mixer faucets cost between $XX and $XX and include plumbing fittings, new escutcheons, and any finish-matching pieces.
On a piece of equipment? A single slow drip can waste litres per day. Get it fixed and you reduce the waste and your bill in the long term. Too much water pressure can give you leaks. Checking and adjusting the pressure regulator prevents recurrent issues.
Pros and cons of DIY versus hiring a plumber:
- DIY — Pros: lower parts-only cost, control of schedule, learning opportunity. Cons: risk of incorrect reassembly, missing hidden damage, voiding warranties.
- Plumber — Pros: faster diagnosis, access to hard-to-find parts, proper pressure checks, warranty on labor. Cons: higher upfront cost, need to schedule, possible parts markup.
Weigh the risks. If you lack tools or the leak recurs after a fix, professional help is advisable.
Age Factor
Gauge your faucet’s age by purchase records, style, or maker marks to estimate how much life it has left. Older faucets tend to have brass or plated parts that corrode and trap mineral deposits, which makes them harder to repair. If an old fixture continuously leaks, it means that the cartridges and seats or seals inside are wearing out.
Newer models tend to have standardized cartridges and parts that are more readily available. They frequently satisfy new water-efficiency requirements, consuming less than older taps. If corrosion or frequent failures exist, replacement might be less expensive than repair.
Future Proofing
Choose quality parts and fixtures that follow current plumbing codes and are long-lasting. Select cartridges and seals from trusted brands and verify metric sizing for worldwide fit. Choose water-saving designs like aerators and pressure-compensating cartridges that cut flow and maintain performance.
Plan for access: Pick fixtures that allow easy disassembly and have available replacement parts locally. Favor corrosion-resistant finishes such as brushed stainless or PVD and brass with protective coatings.
With regular cleaning to remove mineral deposits and routine checks, the service life of these hot water heaters can be extended. If you’re not sure, ask a good plumber.
Water Pressure Impact
Water pressure influences bathtub faucet performance and part wear and tear. High pressure pushes more water through seals and cartridges, accelerating wear and potentially causing micro-fractures. Low pressure can leave valves partially open as people attempt to get usable flow, which wastes parts and can lead to drips.
Check pressure pre-repair so you know whether it’s a root cause or a problem that lingers after parts are swapped.
Before Repair
Look for irregular flow at the tub and other fixtures, since rapid surges, spitting, or banging pipes typically indicate pressure swings. These signs indicate the issue is on the supply side, not just one bad washer.
Document the drip speed in seconds per drop and observe damage such as corroded stems, fractured seats, or scale deposits. Snap a quick picture and record baseline readings to know that you have a nice before state.
Make a short list of symptoms tied to pressure: frequent dripping, seals pushed out of place, valve chatter, and inconsistent hot and cold balance. High pressure makes leaks and low pressure causes the cartridges to stick.
Test the shower, sink, and toilet. If several fixtures demonstrate the same leaks or weak flow, the problem is probably system-wide. That pattern tends to indicate a worn-out pressure regulator or a main line pressure shift.
After Repair
Watch the faucet right away once you replace or tighten pieces. A nice, even stream with no drops is promising, but false positives occur if the pressure hasn’t been relieved yet and the duress will reveal itself later.
Gauge pressure at the tub and other points for a few days. Test with a gauge at the hose bib or inline tester, and compare readings with your pre-fix notes to verify enhancement.
Keep an eye on your water bill for the next billing cycle. A significant decline can validate lower waste from ceased leaks. I’ve seen instances of mains pressure fixes or pressure regulators installed that ended a decade-long spout leak and decreased consumer costs.
- Water pressure impact. Identify new drips, pipe noise and re-test pressure. If irregularities return, it’s time to install or adjust a pressure regulator.
Aside from keeping pressure from reaching extremes, it can extend the life of your fixtures by reducing strain on seals and valves.
Beyond The Drip
A constant drip usually means bath pipe issues. Fixing that obvious leak is the right thing, but it’s not enough. Get to the root causes by looking at valve seats, supply lines, cartridge O-rings, and water pressure. Brass corrosion, hard water mineral deposits, and loose packing nuts can all cause recurring leaks.
Figure out if the drip is from the spout, handle, or overflow and trace the fault back to the cartridge, washer, or retaining clip. Worn O-rings and cartridges should be replaced immediately. Cartridges use O-rings that wear down over time and often leak when they fail.
Regular Maintenance Routines
Develop a habit of detecting minor errors before they multiply. Inspect handles and spouts each month for looseness. Check supply lines and exposed fittings every three months for moisture or mineral deposits. Flush aerators and spouts every six months to remove sediment.
Exercise shutoff valves once a year to keep them working. Grease O-rings and packing with plumber’s grease when you service the faucet.
- Look over the faucet and nearby fittings once a month for a drip or corrosion.
- Make sure all screws and nuts are tightened, as loose screws and nuts can create water paths.
- Change washers and O-rings at the initial indication of wear or stiffness.
- Clean aerators and spouts to eliminate mineral accumulation every six months.
- Test shutoff valves annually. Switch if they dribble or won’t shut.
- Monitor your home water pressure. Fit a pressure regulator if pressures are above 550 kPa.
Teach family members faucet maintenance to stretch repairs. Demonstrate how to turn handles cautiously, close stop valves in an emergency, and report minor drips immediately. Easy action modification saves wear and tear on components and eliminates annoying dripping sounds.
Water Conservation
Address leaky bathtub faucets first. So many times we have been guilty of putting off fixing that leaky bathtub faucet because it’s “just a drip.” The incessant drip disrupts the home’s tranquility and denotes continuous waste.
Add low-flow aerators or flow restrictors to tub spouts to reduce flow without undermining performance. Small plumbing innovations, such as low-flow fixtures and pressure regulators, assist in decreasing water consumption at home. Fix or replace broken components to avoid water damage and long-term loss.
Table: compare estimated water loss from a dripping faucet, which is approximately 3 to 60 liters per day depending on the drip rate, versus a fixed faucet, which is 0 liters per day. Installing a flow restrictor can cut tub flow by 30 to 50 percent.
Eco-Friendly Parts
Opt for washers, cartridges and fixtures of recyclable metals or certified low-impact materials. Choose WaterSense-labeled or low-flow faucets instead to increase efficiency.
Stay away from components with heavy chemical coatings that will off-gas inside. Back brands that post material sourcing and recycling policies. Little decisions at swap-out time accumulate into genuine savings and fewer eco-impacts.
Conclusion
A constant drip swallows both water and sanity. Tighten fittings or replace worn parts to inhibit most leaks in a single visit. For stems, use a seat wrench or adjustable wrench for metal stems and a cartridge puller for modern valves. Find parts by model or size up old pieces. Reduce pressure if noise or rapid wear occurs. Select replacement when corrosion or recurrent failures appear. Keep a parts kit with extra washers, O-rings, and a cartridge for quick fixes. Monitor water usage post-repair to ensure the leak has been eliminated. Tiny repairs conserve cash and reduce the trash. Test out the above repair steps or contact a local plumber for a quick diagnosis and obvious next steps.
Frequently Asked Questions
How do I stop a bathtub faucet from dripping right away?
Shut off the water under the tub or at the main valve. Then tighten the handle or swap out the worn washer or cartridge. This halts water waste and protects against damage pending a proper fix.
How much does it cost to fix a dripping bathtub faucet?
Here’s the answer. Simple repairs, such as washers and o-rings, cost a few bucks in parts. Cartridge or valve replacements can range from €20 to €100 in parts. Labor varies depending on where you live. Quote before you hire a plumber.
Can I repair a dripping faucet myself?
Okay, if you can turn off water and have basic tools and can follow directions. Change worn out washers, O-rings, or cartridges. If you’re uncertain, consult a licensed plumber to prevent leaks or further damage.
How long will a faucet repair last?
A good, parts-based repair will last years. Longevity is determined by water quality, usage, and proper installation. Replace corroded parts for the best result.
Does water pressure cause a faucet to drip?
High pressure can actually push water through worn seals, making drips even worse. Measure pressure, and if necessary, bring it down with a regulator. Addressing seals typically does the trick.
When should I replace the whole faucet?
Install a new faucet if the valve body is rusted, components are outdated, you’re still leaking, or for a refresh. Sometimes, it can actually be cheaper to just replace it rather than continually fix it.
Could a dripping faucet indicate a bigger plumbing issue?
Yes. Stubborn drips may indicate worn valves, excessive pressure, or lurking leaks. If repairs don’t halt the drip, have a plumber take a look at the system to check for fundamental problems.