


Key Takeaways
- Confirm the thermostat is getting a constant 24 vac power supply by measuring the R and C terminals with a multimeter. Replace blown fuses or reset tripped breakers.
- Ensure wiring corresponds to the thermostat diagram and that the R, C, and green wires are properly located and firmly attached to prevent accidental installation errors when replacing older controls.
- Verify Wi-Fi, router and firmware. Glitches with the network or firmware can cause your new smart thermostat to not work.
- Check for voltage drops, bad transformers, relays, or corrosion from Colombia’s humid climate and fix long wire runs or damaged parts that may be intermittently causing a loss of power.
- Verify the thermostat supports your HVAC type and that a C wire or external transformer or relay is installed when necessary for a constant power connection.
- Diagnose with a checklist, record readings and action, power down at the panel for safety, and contact local technicians who know Colombian installation practices when it persists.
Here’s why your new smart thermostat won’t work: wiring, power, or Wi‑Fi problems.
In Colombia, more typical culprits are missing C‑wire, non-compatible HVAC systems, or flaky home internet in city apartments. Other problems are app setup glitches, aging firmware, or even regional settings like temperature units.
The sections that follow provide quick checks for wiring, power, network, and app steps.
Additionally, there are tips on how to reach out to local HVAC experts and ISP support in Bogotá and other cities.
Malfunction Causes
A new smart thermostat can malfunction for a number of technical reasons. The sections below identify the frequent root causes, what to inspect, and hands-on ways to test each problem in a standard Colombian apartment.
1. Power Supply
Make sure the stat receives a consistent 24 VAC supply from the transformer. Check with a voltage meter at R and C for about 24 volts. A lower voltage or intermittent readings indicate transformer failure, blown fuses, or tripped breakers.
One of the most common causes of odd behavior and partial power is loose wires at the R and C screws. These wires can back out over time. Check the main switchboard for a fuse or tripped breaker and replace or reset as necessary.
If the transformer is on the HVAC control board, check the board’s fuses and relays. A blown fuse or contactor can cut power to the thermostat even if everything else about the system appears normal.
2. Wiring Errors
Check real wiring against the thermostat diagram. Misplacing wires, particularly when swapping out a mechanical stat, is common. Make sure the R wire goes on R, the C wire on C, and the green fan lead on G or COM as needed.
Check wiring at the HVAC control board as well. Wires can be switched or tied into old terminals. Loose terminal-block connections produce intermittent faults and can degrade system efficiency by as much as 30 percent if the HVAC runs incorrectly.
Tighten terminals, label wires when making changes, and don’t mix old control bundles when retrofitting to a digital smart unit!
3. Network Failures
Hope you have strong Wi-Fi. Make sure the thermostat indicates that it’s connected to your network. If it’s not, reboot your router and the stat.
Malfunction reasons: Re-enter SSID/password after any home network modification. Older thermostat firmware doesn’t always play nice with newer Wi-Fi standards used in Colombian apartment buildings, so verify firmware compatibility.
Remote access problems could be indicative of firmware hiccups and not actual HVAC defects.
4. Voltage Fluctuations
Output for steady 24 VAC over time. Malfunction causes include short drops because of relay switching, weak transformer, and long undersized wire runs.
Long cable runs in big homes or buildings can create a voltage drop. Upgrade the gauge if necessary. Faulty isolation relays and bad contactors on the control board will cause intermittent power loss, preventing system start.
Change transformers that won’t maintain constant voltage or you will replace parts over and over.
5. Firmware Glitches
Restart the thermostat to clear transient bugs. Patch with firmware updates to address known issues.
If schedules, display or sensors misread temperature, perform a factory reset and recalibrate with a standalone thermometer. Troubleshooting recurrent errors can indicate falling internal sensors or other electrical miscommunication and may need tech support.
Colombian Climate
Colombia’s complex, varied climate directly impacts smart thermostat performance. It extends from the hot humid coastal lowlands up to cooler Andean highlands. Most houses are located in areas designated as tropical rainforest with hot and wet weather during most months, whereas the altitude induces cooler, drier microclimates.
These distinctions count for sensors, wiring, and system programming. Here are the top regional drivers to monitor and how you can make a new thermostat appear broken when it is reacting to local climate.
Tropical Humidity
The high humidity and frequent rainfall in Colombia can cause condensation within the wall cavities near thermostat mounts. Locate your thermostat away from bathrooms, kitchens, or outside walls susceptible to moisture. Direct drafts from ocean breezes or window leaks will trigger incorrect readings.
Use programmable thermostats that have a humidity sensor so the unit can consider moisture when cycling fans and compressors. Units with integrated temperature and relative humidity control deal with tropical comfort best. Check wiring and terminal connections for green or white corrosion, which develops when lingering moisture comes into contact with an exposed metal surface.
Even minor corrosion can disrupt low-voltage signals. Humid air lowers the heat exchange efficiency of air conditioners, so anticipate slower temperature changes after setpoint adjustments and extend the recovery time programmed into the thermostat to prevent short-cycling the compressor.
High Altitudes
Houses in the Andes have thinner air and cooler surroundings. A thermostat set for sea level will give you a different temperature up high. Recalibrate or select a model that permits manual offset adjustments so room temperatures correspond to the user’s comfort rather than an unadjusted sensor.
HVAC systems could require different runtime and staging at altitude since reduced air density affects heat transfer. Tweak program schedules and cycle lengths accordingly. Pressure swings associated with elevation and local microclimates can upset mechanical relays and certain digital pressure sensors.
Check manufacturer altitude specs and seek out models designed for a broad pressure spectrum. Choose thermostats that have spec sheets specifying performance across elevation ranges and find local installers experienced with Andean installs.
Humidity measures highest in the May to November rainy season and extreme swings from El Niño/La Niña strain both electronics and building envelopes. Coastal homes are bombarded with salt-laden air, which speeds corrosion.
Colombian ClimateCheck thermostats and HVAC systems are checked more often with climate change trends, and they limit moisture ingress with breathable wall boxes and sealed cable entries.
System Compatibility
System compatibility verifies if your new smart thermostat can communicate with and energize the HVAC equipment in your home. Start by matching the HVAC type listed on the thermostat’s spec sheet to your system: single-stage, multi-stage, heat pump, or hybrid systems. Single-stage systems are easiest and compatible with most entry-level smart thermostats.
Multi-stage and heat pump systems require thermostats that support additional stages and reversing valves, respectively, or some stages won’t run or your unit will short cycle. Systems with control panels or interface modules may require a thermostat that supports that panel specifically.
Check if your home has 24 V control circuits or high voltage. While most smart thermostats are designed for 24 V systems, they will support many legacy furnaces and air handlers. High voltage systems, like electric baseboard heaters, use 110 to 120 or 240 VAC and won’t work with typical 24 V smart thermostats.
High-voltage configurations are generally listed as 110, 115, 120 or 240 VAC, in which case you require a high-voltage thermostat or a step-down transformer to get down to 24 V before a smart unit can be applied.
Check to see if you have a good common wire (C wire) available. Most smart thermostats require a steady 24 V supply to power Wi-Fi and screens. If the current wiring provides only occasional power via the heat call, the thermostat might kill its battery and restart often.
A few older systems don’t have a C wire at the thermostat location. You can either run a dedicated C wire, use a power extender kit from the thermostat maker, or install a small external transformer near the furnace or air handler.
Watch for dual transformer and control-panel arrangements. Systems with separate transformers for heat and AC or interface modules need careful wiring and sometimes a diode or isolation relay to prevent backfeed. Dual transformer systems can mess up the thermostat’s electronics unless properly configured or tied.
If you have remote sensor wires for outside weather or auxiliary sensors, verify your thermostat supports those inputs or your system may disregard outside temperature or display errors.
List of compatible models and accessories before purchase. Manufacturers provide compatibility charts listing which thermostats are compatible with furnaces, heat pumps, multi-stage equipment, and control panels.
Older or special systems may require external relay boards or switching relays to manage high current or voltage differences. When in doubt, snap a photo of the furnace control board and thermostat wiring and check with a certified HVAC tech in Bogotá or your local Colombian city for a site specific check.
Diagnostic Steps
Begin by framing the diagnostic process as a methodical checklist: gather tools, cut power, inspect, measure, test, and document. That keeps work secure and reproducible and helps you identify if the issue is electrical, mechanical, or network.
Check Voltage
Measure voltage between the R and C terminals to verify 24VAC. Take a measurement both at the thermostat and at the HVAC control board. A drop in voltage between those points indicates wiring loss or a weak transformer. Contrast measured values with the manufacturer specs for your thermostat model. Some smart stats can handle 20 to 30 VAC, while others are more stringent.
If you don’t see voltage, take that as an indication of transformer, fuse or breaker failure. Verify the furnace/air handler fuse and check your breaker in your panel. For those in Bogotá or Medellín, residential panels have the same basics as anywhere else and electricians here will verify the breaker labels. Mark voltage readings and where you took them on your checklist.
Check exposed conductor length: each thermostat wire should have about 6 mm (⅜ inch) of bare copper for proper contact. Short or frayed leads can lead to a random power loss even when meter readings at rest appear fine.
Inspect Terminals
Remember to turn power off at the panel before touching wires. Check the thermostat terminals for loose or corroded or damaged connections. Tighten terminal screws and reseat wires. A wire that appears fine can still be badly pinched and cause intermittent contact.
Verify each wire is in the proper terminal according to the wiring diagram included with the thermostat or HVAC system. Search for heat marks, melted insulation or pitted metal, which are evidence of arcing or overload that requires professional intervention.
Record every terminal check and corrective action on your log sheet so you can determine if a fix is temporary or recurring. If batteries are involved, switch them out on a yearly basis. Even if the stat is C-wire powered, low batteries can cause strange behavior on certain models.
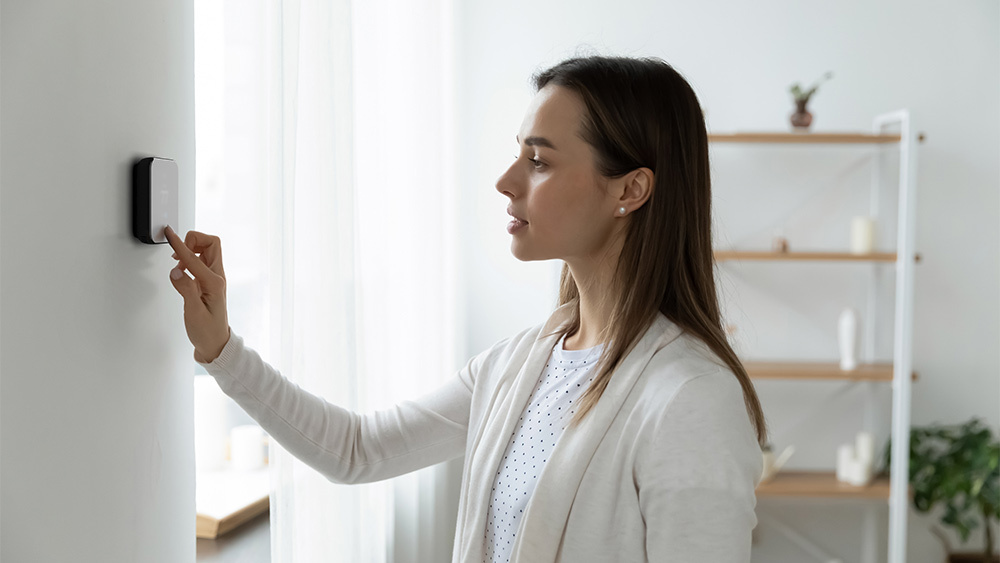
Test Connection
Employ the thermostat’s onboard diagnostics or its app to test communication with the HVAC system. Toggle heat and cool and watch the control board reaction. It should get crisp calls for heat or cool. Watch the screen for error codes and look up code meaning in the manual or vendor support.
Test manual overrides and programming adjustments. If the stat will take the change but the system won’t respond, trouble is probably at the control board or relay. If your Wi-Fi drops, try moving the router or other electronics closer to your thermostat, as interference from other devices or thin walls can block signals.
Log each test result and next action so support calls are effective.
Local Perspectives
Local perspectives local technicians show us the common patterns that explain why your new smart thermostat may not work right out of the box. Many pros start with basic checks: power, wiring, and a boiler test. In regions that experience small-scale outages, a short blackout can reset thermostats or corrupt settings. Techs usually discover that the unit lost its schedule or needs a reboot after those trims.
They update the thermostat app and firmware first, as old firmware is a common culprit in connectivity and control issues. Learn from local pros – ask local technicians about common thermostat installation issues in your region. Technicians mention outdated wiring and legacy boilers as prime offenders. Homes with century-old wiring or two-wire thermostat setups do not have the common C-wire that many smart thermostats anticipate, resulting in flickering power or outright failure.
Some installers install a C-wire adapter or switch to a power stealing capable model, but both solutions have limitations with really old systems. Technicians find bad contacts on boiler terminals and corroded connectors that break signals between thermostat and boiler. Local Differences in HVAC Systems Impact Thermostat Compatibility. Take Stoke-on-Trent, for instance, where thermostats sometimes need to be located in hallways or close to radiators.
These locations provide distorted temperature readings and cause the heat to short cycle. Other local homes might have older combi boilers that do not communicate in the same control language as new smart devices, so the thermostat can send instructions that the boiler disregards. Certain boilers need relay interfaces or an external programmer to bridge the gap between new-age smart controls and old-school hardware.
I suppose the user experience differs from thermostat to thermostat. Mechanical thermostats under-report because they are not accurate. Programmable and smart models expose wiring and placement issues immediately. Homeowners are finding thermostats located in direct sunlight or atop hot radiators registering 2 to 4 degrees Celsius higher than room temperature, leading them to operate less than necessary.
Smart models multiply placement errors because their algorithms presume good sensors. Older boiler users are reporting flaky connections and timeouts. Some say their thermostat seems to function, but the boiler never ignites. Consider the access to local tech support and repairs. Virtually every locale I know has experienced smart thermostat installation and troubleshooting.
They can test boilers, check wiring, update firmware, and recommend placement adjustments. Call-out charges vary; anticipate a diagnostic fee if a visit is required. For DIYers, begin with firmware updates, a power cycle, and verifying that the thermostat location is clear of radiators and direct sun.
Setup Optimization
Set up for success when your new smart thermostat doesn’t work. Begin by aligning the installation stages with the wiring diagram for your specific model, and situating the controls where they’ll measure accurate room conditions. Positioning matters: avoid direct sun, drafts, kitchens or rooms above garages in Bogotá or Medellín where microclimates and building orientation change indoor readings.
Various rooms heat and cool at different times. A living room on the west side, for example, may run hotter in the afternoon and bias whole-house control if the thermostat sits there. Install as directed, consulting your particular model’s wiring diagram. Always turn off power at the breaker before touching wires. Tag each wire as you pull off the old stat and double-check each conductor against the maker schematic.
Hardwiring is often a loose or swapped wire, a frequent failure found on the first install. Make sure your wiring is neat and straight and only 1 cm (3/8”) long to make good contact. Setup Optimization: If the unit requires a C wire, verify that it is present and properly hooked up. Attempting to run a smart thermostat without a C wire can lead to cycle issues, brownouts or random reboots.
Allows you to program schedules and temperature preferences to optimize savings and comfort. Generate weekday and weekend schedules based on occupancy patterns in your Colombian house, such as turning down setpoints during work hours and turning them up before arrival. Use setback ranges, not abrupt swings, to prevent HVAC short-cycling.
Account for room-to-room variation by setting offsets or using remote sensors if available. Place sensors in the rooms you care about, not behind furniture or on exterior walls. Turn on features such as zoning or remote control for additional control over your home’s temperature. If you’re using multiple HVAC zones, connect each to its appropriate controller and check that dampers react to thermostat instructions.
For remote control, connect the thermostat to your home Wi-Fi and the manufacturer app. Test responsiveness from outside the house. Zoning comes in handy when different rooms of a home exhibit different temperature patterns throughout the day or season.
Setup Optimization: Keep your smart thermostat running at peak performance by regularly updating its firmware and reviewing system settings. Look for firmware updates in the app at least once a month and read the changelog for fixes that impact compatibility.
Last, check wiring and settings after updates. It is possible that certain resets could have reverted custom schedules. If the issues persist, reinstall the old thermostat as a diagnostic step or call a licensed HVAC technician to verify system compatibility and diagnose wiring faults.
Conclusion
Your new smart thermostat isn’t working for obvious, repairable causes. Low battery, loose wires, or a missing C wire stop power. Incorrect system type or old firmware prevents controlling. Here in Colombia, dust, power swings, and hot sun on outdoor units add fuel to the fire. Run the simple checks listed earlier: power, wiring, app settings, and HVAC mode. Attempt a factory reset only after elementary diagnostics. If the unit still acts up, call a local HVAC tech or the brand support line. They can test the HVAC board, voltage at thermostat, and any compatibility gaps. Are you prepared to fix it now? Select one test from the diagnostic list and proceed stepwise.
Frequently Asked Questions
Why won’t my new smart thermostat turn on?
First, check power. Check that the C-wire or adapter is connected, breakers are on, and the thermostat display has power. If it is battery operated, change the batteries. A piece of bad wiring or a dead transformer may be the issue.
My thermostat says “not connected” to Wi‑Fi. What now?
Restart your router and thermostat. Note that the Wi-Fi password is required and that the thermostat only supports 2.4 GHz. Move the router closer if the signal is weak. If necessary, update the firmware or reset network settings.
The system won’t heat or cool after installation. Why?
Verify thermostat wiring corresponds with your HVAC system type (heat pump, gas/electric). See if your systems are on the manufacturer’s compatibility list. Bad or unsupported wiring often intercepts heat or cool calls.
Why does my thermostat constantly display incorrect temperature?
Calibrate or move the thermostat out of direct sunlight, kitchen heat, or drafts. Make sure the firmware is updated. A sensor that is bad or in the wrong place gives you false readings and wasted energy.
Why does my thermostat keep losing settings or schedules?
This typically indicates power outages or cloud sync problems. Secure the C-wire and a solid internet connection. Turn back on cloud backup and update the app and device firmware to avoid sync drops.
Can Colombia’s climate affect my smart thermostat performance?
Yes. Even in cities like Bogotá or Medellín, mild temperatures and humidity can alter cycling rhythms. Check that your thermostat’s settings and sensor placement align with local weather for comfort and efficiency.
When should I call a professional installer?
Call a licensed HVAC technician or electrician if wiring isn’t clear. If you don’t have a C-wire, your HVAC doesn’t operate after checks, or you’re uncertain about compatibility, seek professional help. Expert installation prevents damage and warranty issues.